
What You'll Need
Tank & Filtration
- Rimless Aquarium (20 Long recommended)
- Sponge Filter or HOB Filter
- Heater (if keeping tropical fish)
- Clear Hanging Planters (Riparium planters)
Substrate & Media
- Aquasoil or Fine Gravel
- Clay Pebbles (LECA) for planters
- Root Tabs (Fertilizer)
Plants & Lighting
- Full Spectrum LED Light (6500K)
- Emergent Plants (Pothos, Peace Lily, Dracaena)
- Aquatic Plants (Anubias, Cryptocoryne)
- Floating Plants (optional)
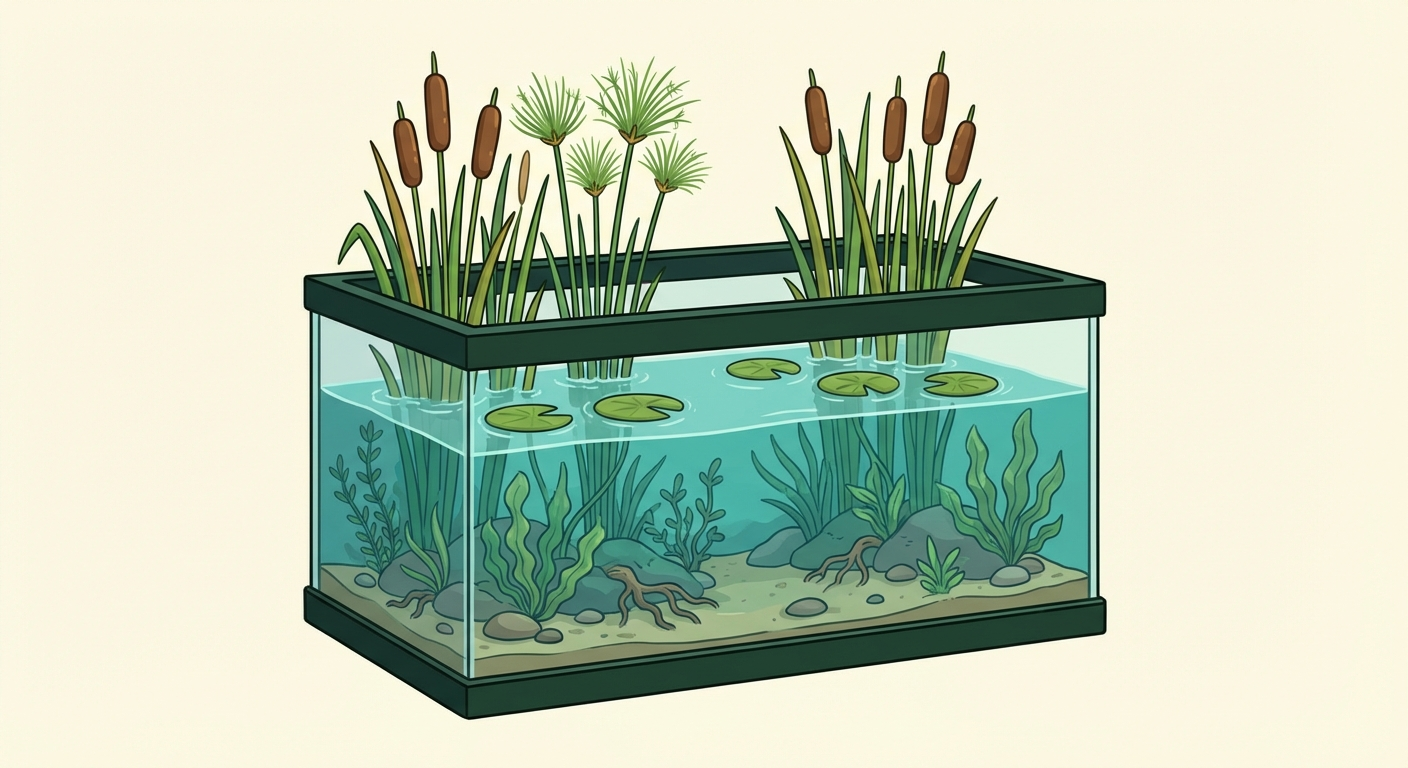
Step 1: Choose Your Tank
A riparium is unique because it is primarily an aquarium, but the visual interest extends above the water line.
We highly recommend a rimless aquarium. The plastic rims on standard tanks can get in the way of the hanging planters used in ripariums. A clear, all-glass tank looks much more elegant when the plants are growing out of it.
Size-wise, a 20-gallon Long is the champion starter size. It's 30 inches long, giving you plenty of horizontal space to create a shoreline effect. Standard rectangular tanks work perfectly fine. You do not need a custom tank like you might for a paludarium.
Important: You generally do not use a glass canopy top for a riparium. The plants need to grow UP and OUT. If you have jump-happy fish, use egg crate (light diffuser) cut to size on top, or leave it open and lower the water level slightly.
Step 2: Plan Your Planting Zones
Visualizing the final layout is crucial because ripariums have depth in three dimensions: underwater, at the water line, and above the water.
Divide your tank into three zones:
- Background (The Wall): This is where your tallest emergent plants go. They should be dense and bushy to hide the wall and equipment.
- Midsground (The Bank): Medium-sized plants that bridge the gap between the tall background and the open water.
- Foreground (The Water): This is mostly open water for fish, with perhaps some low-growing aquatic plants or floating plants.
Sketch the "profile" you want. It should look like a cross-section of a riverbank, gradually getting taller from front to back.
Step 3: Add Aquatic Substrate
The bottom of your tank is for aquatic plants only.
Add 1 to 2 inches of substrate. You can use inert gravel if you plan to dose liquid fertilizer, or aquasoil (like ADA Amazonia or CaribSea Eco-Complete) if you want nutrient-rich substrate for root feeders.
Slope the substrate slightly—higher in the back, lower in the front. This creates a sense of depth and makes the tank look larger. You don't need deep substrate because the heavy "land" plants won't be planted in the bottom; they'll be in planters on the rim.
Step 4: Install Filtration
Water quality is just as important here as in a standard aquarium.
Choose a filter that provides gentle flow. Ripariums rely on plant roots dangling in the water column. If the current is too strong, the roots will be thrashed and won't grow well, and the plants might tip over.
A sponge filter is an excellent choice for smaller ripariums. It provides biological filtration and gentle surface agitation. If you use a Hang-On-Back (HOB) filter, make sure the output isn't pointed directly at the root systems. Baffle the output if necessary.
Step 5: Set Up Lighting
This is the biggest variable in a riparium. Your plants will grow tall.
Choose an LED fixture that is either suspended above the tank or has adjustable height legs. You need clearance. A pothos that starts at 6 inches tall will quickly be 2 feet tall.
You need a full spectrum bulb, around 6500K. This mimics daylight and keeps the leaves of your emergent plants lush and green.
Set your photoperiod to 8-10 hours. Because the water surface is open to the air and exposed to high light, algae can be an issue initially. Start with 8 hours and increase if plants need it.
Step 6: Install Riparium Planters
This is the secret sauce of the riparium. These are special plastic cups with a grate or mesh back that hang on the rim of the tank.
Clip your planters onto the back rim of the tank. Space them out according to your zone plan.
What goes inside? NOT soil. Do not use potting soil in these planters. It will float away, cloud your water, and cause ammonia spikes.
Use LECA (clay pebbles) or small gravel. Fill the planter about 1/3 full. Add a root tab (fertilizer) into the gravel. Place your plant's roots into the planter, then fill the rest of the way with LECA to hold the plant secure.
Step 7: Plant Your Riparium
Now, the fun part. You are essentially building a living wall.
Background Planters: Use large, bushy plants. Pothos (Devil's Ivy) is the king here—it grows fast and filters water amazingly. Peace Lilies (Spathiphyllum) look incredible with their large waxy leaves. Dracaena and Syngonium also work well.
Midsground: Spider Plants or smaller Philodendrons.
Foreground (In the substrate): Plant fully aquatic species here. Anubias and Java Fern tied to driftwood or rocks look great. Cryptocoryne plants can be planted in the substrate to soften the transition between the glass bottom and the water surface.
Fill the tank with dechlorinated water. The water level should ideally be just below the rim of the planters so the roots are fully submerged, but the planter itself isn't drowning the plant's stem base (which can rot).
Step 8: Cycle & Add Livestock
Even though you have lots of plants, you must cycle the tank. The "soil-less" planter method means you won't have the ammonia spike associated with dirt, but you still need to establish beneficial bacteria in your filter.
Run the filter. Test water daily. This usually takes 2 to 4 weeks.
Once Ammonia and Nitrite are zero, add livestock. Ripariums are perfect for fish that enjoy surface cover or lower light.
- Small Schooling Fish: Ember Tetras, Green Neon Tetras.
- Surface Dwellers: Hatchetfish, Killifish.
- Invertebrates: Cherry Shrimp (they love grazing on the roots of the riparium plants), Amano Shrimp.
Add fish slowly. The massive root mass provides incredible surface area for biofilm, which is great for shrimp, but watch your bioload.
Your First Week
The transition from soil to water can be shocking for plants. Here is what to expect:
- Leaf Drooping: Don't panic if your Peace Lily or Pothos looks wilted for the first few days. They are adapting to a different watering method. They usually perk up within a week as new water roots form.
- Melting Leaves: If you moved Cryptocoryne plants, they might melt. This is normal "Crypt melt." Leave the roots in the substrate; they will grow new leaves.
- Root Growth: Watch the planter roots. They should turn from brown/soil-colored to bright white/translucent. This means they are alive and actively filtering the water.
- Water Level: Keep an eye on evaporation. With the open top and large leaf surface area, ripariums evaporate water faster than standard tanks. Top off weekly to avoid stressing the pump.
What's Next?
Your riverbank is established. Keep the jungle growing.