What You'll Need
Tank & Structure
- 20+ Gallon Aquarium or Paludarium Tank
- Egg Crate (Light Diffuser)
- PVC Pipe (for supports)
- Expanding Foam (Great Stuff Pond & Stone)
- Black Aquarium Silicone
Water & Land Features
- Submersible Water Pump
- Tubing (Fountain/Spitter tubing)
- LECA / Hydroton (False bottom)
- ABG Substrate Mix
- Aquatic Gravel/Sand
Plants & Lighting
- LED Grow Light (High intensity)
- Aquatic Plants (Anubias, Java Fern)
- Terrestrial Plants (Ferns, Mosses)
- Moss (Java Moss, Sheet Moss)
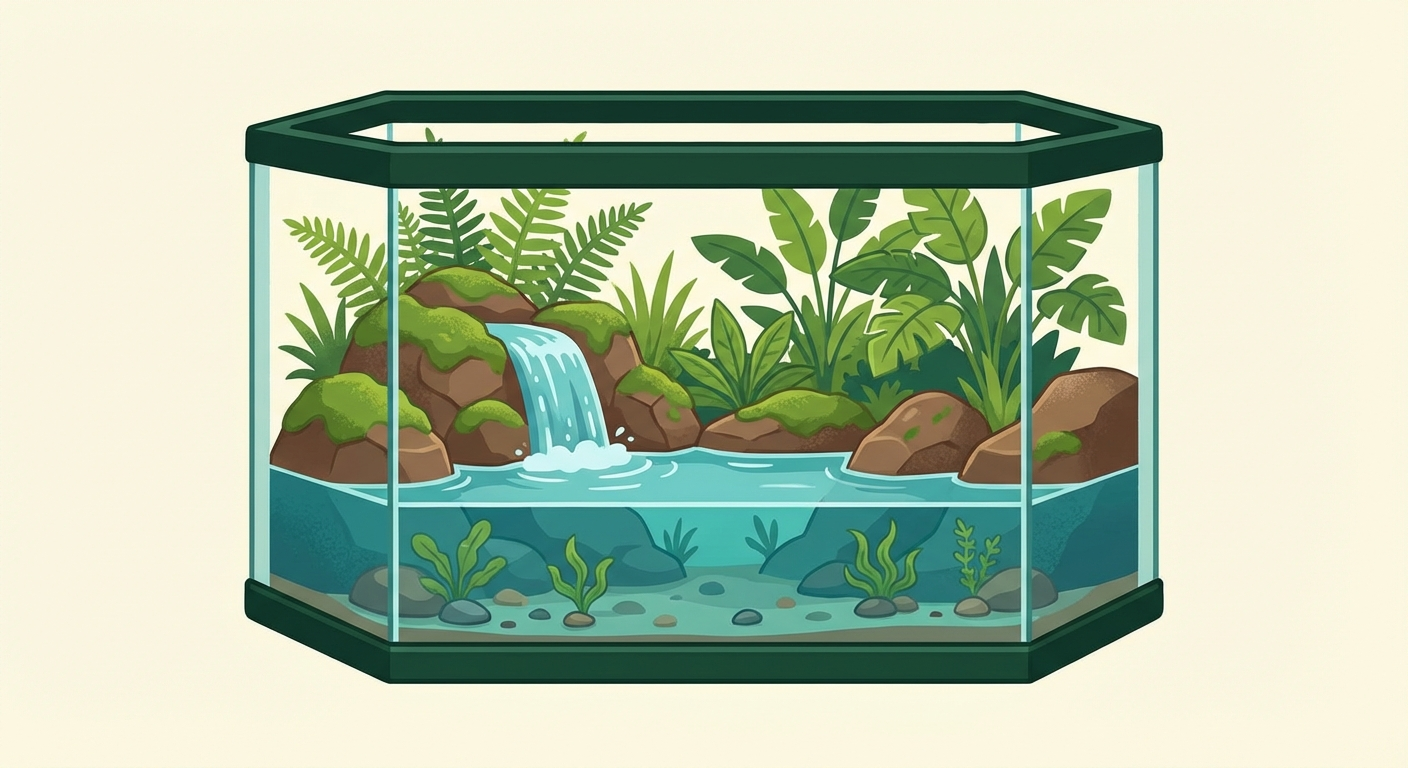
Step 1: Choose Your Enclosure
A paludarium is unique because it must hold water securely without leaking, while simultaneously supporting heavy land masses. A standard glass aquarium is perfectly fine for this.
We recommend a minimum of 20 gallons, but 20-gallon "Long" or 29-gallon tanks are ideal because they offer more horizontal width for the shoreline. You can also buy specialized paludarium tanks that have a lower front glass pane, allowing for a deeper water section that is easier to view.
Ensure the tank is rimless or has a rim that doesn't interfere with your background foam application. Before starting, clean the glass thoroughly with vinegar to remove any manufacturing residues that might prevent silicone from sticking.
Step 2: Design Your Land/Water Split
Before you pick up the foam gun, you need a blueprint. The ratio of land to water depends on what you want to keep.
- Crab/Mangrove setups: 70% Land / 30% Water.
- Newt/Salamander setups: 50% Land / 50% Water.
- Fish/Turtle setups: 30% Land / 70% Water.
Sketch this on paper. The most critical design element is the divider. This is the barrier that keeps your soil from falling into the water. You have three main choices:
- The Glass Wall: A piece of silicone glass separating the zones. Clean but artificial looking.
- The Cork Wall: Stacking pieces of cork bark to form a dam. Natural, but requires skill to seal.
- The Foam Wall (Recommended): Using expanding foam to build a custom dam. This is the most versatile method.
Step 3: Build the False Bottom & Divider
This is the engineering phase. You are building the basement of your land area.
Cut egg crate (light diffuser) to fit the area you want to be land. Support this egg crate 1-2 inches off the bottom of the tank using PVC pipe sections cut to height. This creates a void space—the reservoir—underneath your land.
Now, build the dam. Place a strip of egg crate vertically to separate the land reservoir from the open water section. Silicone this vertical piece to the bottom glass and the side walls. Let this cure for 24 hours.
Step 4: Create the Water Section
With the divider cured, it's time to set up the aquatic zone.
Place your submersible pump in the water section. Hide it behind a rock or piece of wood—you don't want to see the equipment. Run the tubing up the back wall (or through the foam wall if you built a channel for it) to create a waterfall outlet.
Add your aquatic substrate. Sand or fine gravel works best for the bottom. Slope it up slightly towards the dam to create a natural shoreline look.
Fill the tank with dechlorinated water. Check your pump flow. You want a gentle current, not a fire hose. Paludariums often house amphibians that dislike strong flow.
Step 5: Build Up the Land Section
Now we backfill the land area.
First, add a layer of fiberglass mesh over the egg crate false bottom. Then, add your drainage layer (LECA) on top of the mesh inside the land zone.
Now, add your substrate (ABG mix). Build it up higher than the dam wall. The substrate will settle over time, so overfill it slightly.
The Transition Zone: This is the area where the land meets the water. This is where the magic happens. Slope the substrate gently down to the water level. You will place mosses here later. This zone acts as a wick, pulling water up into the soil from the reservoir below.
Step 6: Add Hardscape
Connect the two worlds visually. Use large pieces of driftwood or slate that bridge the water section and rest on the land.
If you built a foam wall, this is the time to carve it. Expanding foam cures to a yellowish color. Carve it to look like a dirt bank or rock face. You can press pebbles into wet foam (before it fully hardens) to texture it.
Ensure there are "highways" for animals to get out of the water easily. A smooth glass wall is impossible for a crab or newt to climb. Provide a ramp of wood or rocks.
Step 7: Install Lighting & Humidity
Paludariums are deep and often shadowed by the background wall. You need powerful lighting.
An LED fixture with high PAR (Photosynthetically Active Radiation) is necessary to reach the plants at the bottom of the land section. If you have a waterfall, the water movement will help humidity, but you still need to mist the terrestrial plants at least once daily.
The water section acts as a natural humidifier, so you generally won't struggle with dry air like in a terrarium. The challenge is usually too much condensation on the front glass. Ensure you have some ventilation, either via a fan or slightly cracked top vents.
Step 8: Plant Both Zones
You are essentially aquascaping and terrascaping in one build.
In the Water: Plant species that can tolerate emersed growth (growing out of water) or fully submerged. Anubias and Java Fern are kings here. You can tie them to your driftwood bridges. Java Moss is excellent for covering the foam dam to make it look like a mossy bank.
On the Land: Use moisture-loving plants. Ferns (Boston, Maidenhair), Fittonia, and Pilea work well. Bromeliads can be glued to the background foam.
The Transition: This is the best spot for "riparian" plants like creeping fig or Selaginella. They will drape their roots into the water and grow across the soil.
Step 9: Cycle the Water
Even though there is soil involved, the water section is an aquarium. It must cycle.
Run the pump 24/7. Test your water parameters (Ammonia, Nitrite, Nitrate) every few days. You will likely see an Ammonia spike. This is normal. It will convert to Nitrite, then Nitrate.
This process takes 2 to 4 weeks. Do not add sensitive aquatic livestock until Ammonia and Nitrite are 0 ppm. You can add terrestrial cleanup crew (isopods) to the land section during this time so they get established.
Step 10: Add Animals
Once the water is cycled and the plants are rooted, you can add life.
Choose species that truly utilize both zones. Mudskippers, Fiddler Crabs, Fire-bellied Toads, or Newts are classic paludarium inhabitants.
Add fish slowly. The water volume in a paludarium is usually smaller than it looks (because of the land displacement), so don't overstock. Monitor evaporation closely—paludariums lose water faster than standard aquariums due to the waterfall and open land area. Top off with dechlorinated water weekly.
Your First Week
This is a complex system. Here is what to watch out for:
- Cloudy Water: If the water turns milky white, it's a bacterial bloom from the new soil/wood interacting with water. It's not harmful but looks ugly. It usually clears up in a few days. Do large water changes if it persists.
- Foam Bubbles: The waterfall might create bubbles at the base. This is often DOCs (Dissolved Organic Compounds) from the soil. Skim them off with a cup.
- Substrate Slumping: Soil may wash down the dam. If this happens, add more moss to hold it in place or use small stones to build a retaining wall.
- Check the Divider: Keep an eye on the water level on the land side (behind the dam). It shouldn't rise to the level of the soil surface. If it does, your drainage might be clogged.
What's Next?
Your paludarium is a masterpiece. Keep it running smoothly.